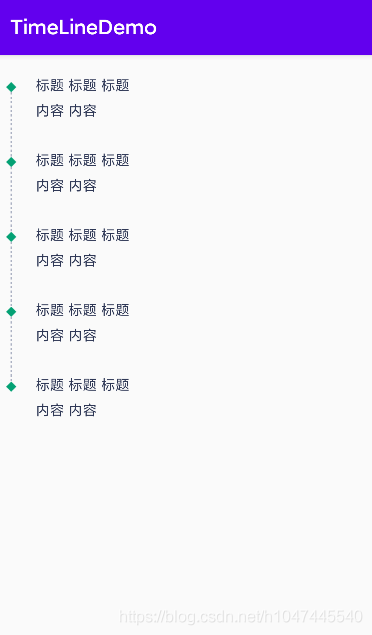
效果图
代码
package com.jh.timelinedemo;

import android.content.Context;
import android.content.res.TypedArray;
import android.graphics.Canvas;
import android.graphics.DashPathEffect;
import android.graphics.Paint;
import android.util.AttributeSet;
import android.view.View;


/**
 * @Description: Android自定义虚线
 * @Date 2019-07-20 10:07
 * @Version
 */
public class DividerView extends View {
    static public int ORIENTATION_HORIZONTAL = 0;
    static public int ORIENTATION_VERTICAL = 1;
    private Paint mPaint;
    private int orientation;

    public DividerView(Context context) {
        this(context, null);
    }

    public DividerView(Context context, AttributeSet attrs) {
        super(context, attrs);
        int dashGap, dashLength, dashThickness;
        int color;

        TypedArray a = context.getTheme().obtainStyledAttributes(attrs, R.styleable.DividerView, 0, 0);

        try {
            dashGap = a.getDimensionPixelSize(R.styleable.DividerView_dashGap, 5);
            dashLength = a.getDimensionPixelSize(R.styleable.DividerView_dashLength, 5);
            dashThickness = a.getDimensionPixelSize(R.styleable.DividerView_dashThickness, 3);
            color = a.getColor(R.styleable.DividerView_divider_line_color, 0xff000000);
            orientation = a.getInt(R.styleable.DividerView_divider_orientation, ORIENTATION_HORIZONTAL);
        } finally {
            a.recycle();
        }

        mPaint = new Paint();
        mPaint.setAntiAlias(true);
        mPaint.setColor(color);
        mPaint.setStyle(Paint.Style.STROKE);
        mPaint.setStrokeWidth(dashThickness);
        mPaint.setPathEffect(new DashPathEffect(new float[]{dashGap, dashLength,}, 0));
    }

    public void setBgColor(int color) {
        mPaint.setColor(color);
        invalidate();
    }

    @Override
    protected void onDraw(Canvas canvas) {
        if (orientation == ORIENTATION_HORIZONTAL) {
            float center = getHeight() * 0.5f;
            canvas.drawLine(0, center, getWidth(), center, mPaint);
        } else {
            float center = getWidth() * 0.5f;
            canvas.drawLine(center, 0, center, getHeight(), mPaint);
        }
    }
}
package com.jh.timelinedemo;

import androidx.appcompat.app.AppCompatActivity;
import androidx.recyclerview.widget.LinearLayoutManager;
import androidx.recyclerview.widget.RecyclerView;

import android.os.Bundle;
import android.view.View;

public class MainActivity extends AppCompatActivity {

    private RecyclerView rcy;

    @Override
    protected void onCreate(Bundle savedInstanceState) {
        super.onCreate(savedInstanceState);
        setContentView(R.layout.activity_main);
        rcy = findViewById(R.id.rcy);

        LinearLayoutManager manager = new LinearLayoutManager(this, RecyclerView.VERTICAL, false);
        rcy.setLayoutManager(manager);
        TimeLineAdapter adapter = new TimeLineAdapter(this);
        rcy.setAdapter(adapter);
    }
}
<?xml version="1.0" encoding="utf-8"?>
<LinearLayout xmlns:android="http://schemas.android.com/apk/res/android"
    xmlns:app="http://schemas.android.com/apk/res-auto"
    xmlns:tools="http://schemas.android.com/tools"
    android:layout_width="match_parent"
    android:layout_height="match_parent"
    android:orientation="vertical"
    tools:context=".MainActivity">

    <androidx.recyclerview.widget.RecyclerView
        android:id="@ id/rcy"
        android:layout_width="match_parent"
        android:layout_height="match_parent"
        android:layout_marginTop="20dp" />

</LinearLayout>
package com.jh.timelinedemo;

import android.content.Context;
import android.view.LayoutInflater;
import android.view.View;
import android.view.ViewGroup;

import androidx.annotation.NonNull;
import androidx.recyclerview.widget.RecyclerView;

/**
 *
 * @date:on 2021/7/21 17:38
 */
public class TimeLineAdapter extends RecyclerView.Adapter<TimeLineAdapter.ViewHolder> {

    private Context context;

    public TimeLineAdapter(Context context) {
        this.context = context;
    }

    @NonNull
    @Override
    public TimeLineAdapter.ViewHolder onCreateViewHolder(@NonNull ViewGroup parent, int viewType) {
        View inflate = LayoutInflater.from(parent.getContext()).inflate(R.layout.item_layout, null);
        ViewHolder viewHolder = new ViewHolder(inflate);
        return viewHolder;
    }

    @Override
    public void onBindViewHolder(@NonNull TimeLineAdapter.ViewHolder holder, int position) {
        holder.line_up.setVisibility(position == 0 ? View.INVISIBLE : View.VISIBLE);//第一条数据隐藏头部线
        holder.line_down.setVisibility(position == 4 ? View.INVISIBLE : View.VISIBLE);//最后一条数据隐藏底部线
    }

    @Override
    public int getItemCount() {
        return 5;
    }

    class ViewHolder extends RecyclerView.ViewHolder {

        private final DividerView line_up, line_down;

        public ViewHolder(@NonNull View itemView) {
            super(itemView);
            line_up = itemView.findViewById(R.id.line_up);
            line_down = itemView.findViewById(R.id.line_down);
        }
    }
}
<?xml version="1.0" encoding="utf-8"?>
<LinearLayout xmlns:android="http://schemas.android.com/apk/res/android"
    android:layout_width="match_parent"
    android:layout_height="wrap_content"
    xmlns:custom="http://schemas.android.com/apk/res-auto"
    android:orientation="horizontal"
    android:id="@ id/rl_history_root">

    <LinearLayout
        android:layout_width="10dp"
        android:layout_height="match_parent"
        android:gravity="center_horizontal"
        android:layout_marginLeft="12dp"
        android:orientation="vertical">

        <com.jh.timelinedemo.DividerView
            android:id="@ id/line_up"
            android:layout_width="1dp"
            android:layout_height="7dp"
            android:layerType="software"
            custom:dashGap="2dp"
            custom:dashLength="2dp"
            custom:dashThickness="1dp"
            custom:divider_line_color="#A3A9BD"
            custom:divider_orientation="vertical" />

        <ImageView
            android:layout_width="10dp"
            android:layout_height="10dp"
            android:id="@ id/iv_history_rhombus"
            android:src="@mipmap/ic_rhombus_green" />

        <com.jh.timelinedemo.DividerView
            android:id="@ id/line_down"
            android:layout_width="1dp"
            android:layout_height="match_parent"
            android:layerType="software"
            custom:dashGap="2dp"
            custom:dashLength="2dp"
            custom:dashThickness="1dp"
            custom:divider_line_color="#A3A9BD"
            custom:divider_orientation="vertical" />

    </LinearLayout>

    <LinearLayout
        android:layout_width="match_parent"
        android:layout_height="match_parent"
        android:layout_marginLeft="19dp"
        android:orientation="vertical"
        android:paddingBottom="30dp">


        <TextView
            android:layout_width="wrap_content"
            android:layout_height="wrap_content"
            android:layout_centerVertical="true"
            android:text="标题 标题 标题"
            android:textColor="#2f3856"
            android:textSize="14sp" />

        <TextView
            android:layout_width="wrap_content"
            android:layout_height="wrap_content"
            android:layout_centerVertical="true"
            android:layout_marginTop="6dp"
            android:text="内容 内容 "
            android:textColor="#2f3856"
            android:textSize="14sp" />

    </LinearLayout>
</LinearLayout>
   <!-- 垂直方向的虚线 -->
    <declare-styleable name="DividerView">
        <!-- 虚线颜色 -->
        <attr name="divider_line_color" format="color"/>
        <!-- 虚线宽度 -->
        <attr name="dashThickness" format="dimension"/>
        <!-- 虚线dash宽度 -->
        <attr name="dashLength" format="dimension"/>
        <!-- 虚线dash间隔 -->
        <attr name="dashGap" format="dimension"/>
        <!-- 虚线朝向 -->
        <attr name="divider_orientation" format="enum">
            <enum name="horizontal" value="0"/>
            <enum name="vertical" value="1"/>
        </attr>
    </declare-styleable>
到此这篇关于Android recyclerview实现纵向虚线时间轴的示例代码的文章就介绍到这了,更多相关Android recyclerview纵向虚线时间轴内容请搜索Devmax以前的文章或继续浏览下面的相关文章希望大家以后多多支持Devmax!