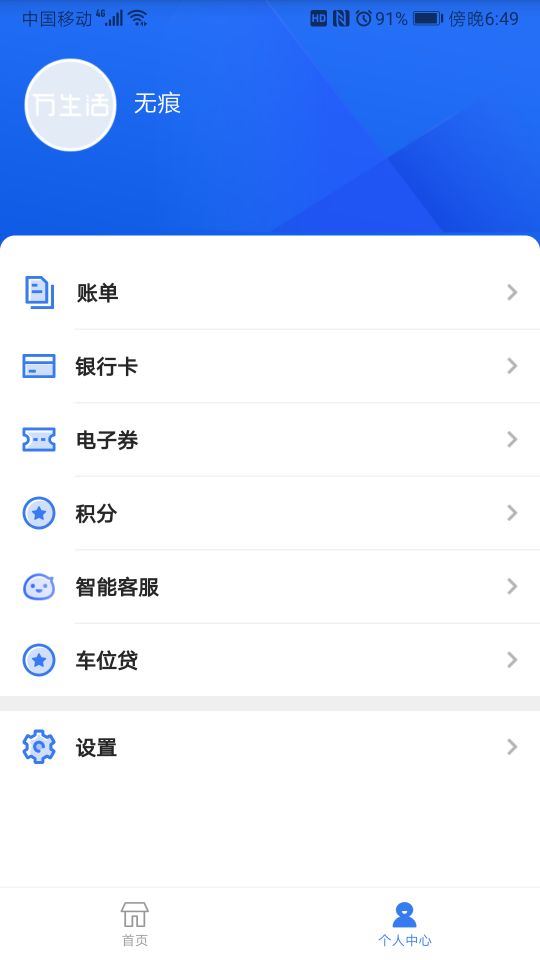
今天介绍一下,我在项目开发过程中,实现状态栏和虚拟按键背景颜色变化的方法,实现方式是,通过隐藏系统的状态栏和虚拟按键的背景,实现图片和背景显示到状态栏和虚拟按键下方。下面来看实现代码:
实现状态栏背景的设置
状态栏工具类
public class StatusBarUtil {
 /**
 * 设置沉浸式状态栏
 *
 * @param activity 需要设置的activity
 */
 public static void setTransparent(Activity activity) {
 //API19一下不考虑
 if (Build.VERSION.SDK_INT < Build.VERSION_CODES.KITKAT) {
  return;
 }
 transparentStatusBar(activity);
 setStatusBarTextColor(activity, Color.WHITE);
 }
 /**
 * 使状态栏透明
 */
 @TargetApi(Build.VERSION_CODES.KITKAT)
 private static void transparentStatusBar(Activity activity) {
 Window window = activity.getWindow();
 if (Build.VERSION.SDK_INT >= Build.VERSION_CODES.LOLLIPOP) {
  window.addFlags(WindowManager.LayoutParams.FLAG_DRAWS_SYSTEM_BAR_BACKGROUNDS);
  window.clearFlags(WindowManager.LayoutParams.FLAG_TRANSLUCENT_STATUS);
  //设置虚拟按键背景透明,同时该属性会实现沉浸式状态栏
  window.addFlags(WindowManager.LayoutParams.FLAG_TRANSLUCENT_NAVIGATION);
  window.setStatusBarColor(Color.TRANSPARENT);
//  window.setNavigationBarColor(Color.BLACK);
 } else if (Build.VERSION.SDK_INT >= Build.VERSION_CODES.KITKAT) {
  window.addFlags(WindowManager.LayoutParams.FLAG_TRANSLUCENT_STATUS);
  window.clearFlags(WindowManager.LayoutParams.FLAG_TRANSLUCENT_NAVIGATION);
 }
 }
 /**
 * Android 6.0 以上设置状态栏颜色
 */
 protected static void setStatusBarTextColor(Activity activity, @ColorInt int color) {
 if (Build.VERSION.SDK_INT >= Build.VERSION_CODES.M) {
  // 如果亮色,设置状态栏文字为黑色
  if (isLightColor(color)) {
  activity.getWindow().getDecorView().setSystemUiVisibility(View.SYSTEM_UI_FLAG_LIGHT_STATUS_BAR);
  } else {
  activity.getWindow().getDecorView().setSystemUiVisibility(View.SYSTEM_UI_FLAG_VISIBLE);
  }
 }
 }
 /**
 * 判断颜色是不是亮色
 *
 * @param color
 * @return
 * @from https://stackoverflow.com/questions/24260853/check-if-color-is-dark-or-light-in-android
 */
 private static boolean isLightColor(@ColorInt int color) {
 return ColorUtils.calculateLuminance(color) >= 0.5;
 }
 /**
 * 将布局设置为状态栏的高度
 *
 * @param context
 * @param view
 */
 public static void setStatusBarHeight(Context context, View view) {
 // 获得状态栏高度
 int height = getStatusBarHeight(context);
 ViewGroup.LayoutParams layoutParams = view.getLayoutParams();
 layoutParams.height = height;
 view.setLayoutParams(layoutParams);
// status_bar.requestLayout();//请求重新布局
 }
 /**
 * 获取状态栏高度
 *
 * @param context context
 * @return 状态栏高度
 */
 public static int getStatusBarHeight(Context context) {
 // 获得状态栏高度
 int resourceId = context.getResources().getIdentifier("status_bar_height", "dimen", "android");
 return context.getResources().getDimensionPixelSize(resourceId);
 }
}
调用方式(在super.onCreate(savedInstanceState)方法之前调用):
StatusBarUtil.setTransparent(this);
该方法中,首先判断API版本,由于API19以下没有设置状态栏的方法,所以我们只考虑19以上的版本,接着调用了transparentStatusBar()方法,根据API21为分界,分别实现状态栏背景的透明,然后是调用setStatusBarTextColor()方法,设置状态栏字体的颜色。
实现效果:
1、沉浸式

2、自定义状态栏,我设置的背景为白色

如果要填充自己需要的导航栏颜色的话,可以自己创建一个导航栏布局layout_head,
<?xml version="1.0" encoding="utf-8"?>
<LinearLayout xmlns:android="http://schemas.android.com/apk/res/android"
 android:layout_width="match_parent"
 android:layout_height="wrap_content"
 android:background="@color/bgGray"
 android:orientation="vertical">
 <View
 android:id="@ id/status_bar"
 android:layout_width="match_parent"
 android:layout_height="wrap_content"
 android:background="@color/white"/>
</LinearLayout>
通过以下代码:
protected View getHeadView() {
 View view = View.inflate(activity, R.layout.layout_head, null);
 View status_bar = view.findViewById(R.id.status_bar);
 //status_bar .setBackground()
 StatusBarUtil.setStatusBarHeight(activity, status_bar);
 return view;
 }
 // frameLayout是你的activity留出的状态栏布局
 frameLayout.addView(getHeadView());
这样,就可以设置自己想要的状态栏的颜色和高度了。
虚拟按键背景颜色的设置
虚拟按键工具类
public class NavigationBarUtil {
 public static void initActivity(View content) {
 new NavigationBarUtil(content);
 }
 /**
 * 被监听的视图
 */
 private View mObserved;
 /**
 * 视图变化前的可用高度
 */
 private int usableHeightView;
 private ViewGroup.LayoutParams layoutParams;
 private NavigationBarUtil(View content) {
 mObserved = content;
 //给View添加全局的布局监听器监听视图的变化
 mObserved.getViewTreeObserver().addOnGlobalLayoutListener(new ViewTreeObserver.OnGlobalLayoutListener() {
  @Override
  public void onGlobalLayout() {
  resetViewHeight1();
  }
 });
 layoutParams = mObserved.getLayoutParams();
 }
 private int usableHeight = 0;
 private void resetViewHeight1() {
 int usableHeightViewNow = CalculateAvailableHeight();
 //比较布局变化前后的View的可用高度
 InputMethodManager inputMethodManager = (InputMethodManager) VankeApplication.getApplication().getSystemService(Context.INPUT_METHOD_SERVICE);
 Rect rect = new Rect();
 mObserved.getWindowVisibleDisplayFrame(rect);
 usableHeight = Math.max(usableHeight, rect.bottom);
 if (inputMethodManager.isActive() && usableHeight > rect.bottom) {//软键盘显示,导致界面布局改变
  return;
 }
 if (usableHeightViewNow != usableHeightView) {
  //如果两次高度不一致
  //将当前的View的可用高度设置成View的实际高度
  Configuration mConfiguration = VankeApplication.getApplication().getResources().getConfiguration(); //获取设置的配置信息
  int ori = mConfiguration.orientation; //获取屏幕方向
  if (ori == Configuration.ORIENTATION_LANDSCAPE) {
  //横屏
  layoutParams.width = usableHeightViewNow;
  } else if (ori == Configuration.ORIENTATION_PORTRAIT) {
  //竖屏
  layoutParams.height = usableHeightViewNow;
  }
  mObserved.requestLayout();//请求重新布局
  usableHeightView = usableHeightViewNow;
 }
 }
 /**
 * 计算试图高度
 *
 * @return
 */
 private int CalculateAvailableHeight() {
 Rect r = new Rect();
 mObserved.getWindowVisibleDisplayFrame(r);
 Configuration mConfiguration = VankeApplication.getApplication().getResources().getConfiguration(); //获取设置的配置信息
 int ori = mConfiguration.orientation; //获取屏幕方向
 if (ori == Configuration.ORIENTATION_LANDSCAPE) {
  //横屏
  return (r.right);
 } else if (ori == Configuration.ORIENTATION_PORTRAIT) {
  //竖屏
  return (r.bottom);
 }
// return (r.bottom - r.top);//如果不是沉浸状态栏,需要减去顶部高度
 return (r.bottom);//如果是沉浸状态栏
 }
 /**
 * 判断底部是否有虚拟键
 *
 * @param context
 * @return
 */
 public static boolean hasNavigationBar(Context context) {
 boolean hasNavigationBar = false;
 Resources rs = context.getResources();
 int id = rs.getIdentifier("config_showNavigationBar", "bool", "android");
 if (id > 0) {
  hasNavigationBar = rs.getBoolean(id);
 }
 try {
  Class systemPropertiesClass = Class.forName("android.os.SystemProperties");
  Method m = systemPropertiesClass.getMethod("get", String.class);
  String navBarOverride = (String) m.invoke(systemPropertiesClass, "qemu.hw.mainkeys");
  if ("1".equals(navBarOverride)) {
  hasNavigationBar = false;
  } else if ("0".equals(navBarOverride)) {
  hasNavigationBar = true;
  }
 } catch (Exception e) {
 }
 return hasNavigationBar;
 }
}
调用方式(在onCreate()中调用):
if (NavigationBarUtil.hasNavigationBar(this)) {
  NavigationBarUtil.initActivity(findViewById(android.R.id.content));
 }
这里我直接使用的系统的布局,首先调用hasNavigationBar()判断是否有虚拟按键,如果有,则调用initActivity()初始化NavigationBarUtil工具类,在工具类的构造方法中,给传入的view添加了全局的布局监听器,监听视图的变化,在监听器中,调用resetViewHeight1()方法,里面通过CalculateAvailableHeight()获取虚拟按键的高度,根据横竖屏的不同,分别设置了view的高度,实现了虚拟按键布局背景的填充。
总结
以上所述是小编给大家介绍的Android实现状态栏和虚拟按键背景颜色的变化实例代码详解,希望对大家有所帮助,如果大家有任何疑问请给我留言,小编会及时回复大家的。在此也非常感谢大家对Devmax网站的支持!
如果你觉得本文对你有帮助,欢迎转载,烦请注明出处,谢谢!