看效果
这是一个全局的按钮,可以换成图片,自己写样式,每个页面都有;
须知:
1.uni.getSystemInfoSync()获取手机的信息接口
可以拿到手机屏幕的宽高


2.uni.createSelectorQuery().in(this)
uniapp中式没有window对象,和dom元素的,但是有时我们需要获取页面上节点的一些几何信息;
@touchcancel 手指触摸被打断,如来电提醒,弹窗
@touchend 手指触摸动作结束,如松开按钮
@touchmove 手指触摸后移动
@touchstart 手指触摸动作开始
3.touchmove滑动事件
@touchcancel 手指触摸被打断,如来电提醒,弹窗
@touchend 手指触摸动作结束,如松开按钮
@touchmove 手指触摸后移动
@touchstart 手指触摸动作开始

记录用户按下屏幕的坐标 x 和 y
touchmove(e) {
				// 单指触摸
				if (e.touches.length !== 1) {
					return false;
				}
				console.log('移动',e);
				this.isMove = true;

				this.left = e.touches[0].clientX - this.offsetWidth;
				let clientY = e.touches[0].clientY - this.offsetHeight;
				// #ifdef H5
				clientY  = this.height;
				// #endif
				let edgeBottom = this.windowHeight - this.height - this.edge;
				// 上下触及边界
				if (clientY < this.edge) {
					this.top = this.edge;
				} else if (clientY > edgeBottom) {
					this.top = edgeBottom;
				} else {
					this.top = clientY
				//将top存入本地存储
				 uni.setStorageSync("top", this.top);
			},
			touchend(e) {
				if (this.isDock) {
					let edgeRigth = this.windowWidth - this.width - this.edge;
					if (this.left < this.windowWidth / 2 - this.offsetWidth) {
						this.left = this.edge;
					} else {
						this.left = edgeRigth;
					}
				//将left存入本地存储
				 uni.setStorageSync("left", this.left);
				this.isMove = false;
				this.$emit('btnTouchend');
		}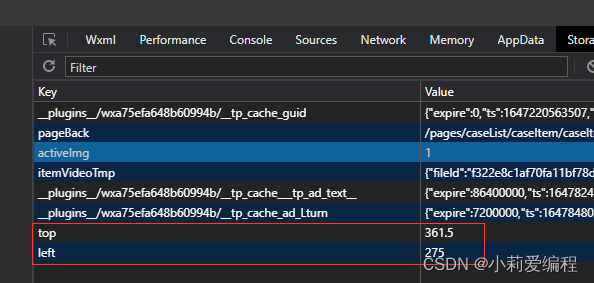
每次移动这个按钮,本地存储的值都会改变;
取出存储的值
onShow() {
//获取手机信息配置接口
const sys = uni.getSystemInfoSync();
//屏幕的宽高
this.windowWidth = sys.windowWidth;
this.windowHeight = sys.windowHeight;
// #ifdef APP-PLUS
this.existTabBar && (this.windowHeight -= 50);
// #endif
if (sys.windowTop) {
this.windowHeight = sys.windowTop;
}
//获取元素
const query = uni.createSelectorQuery().in(this);
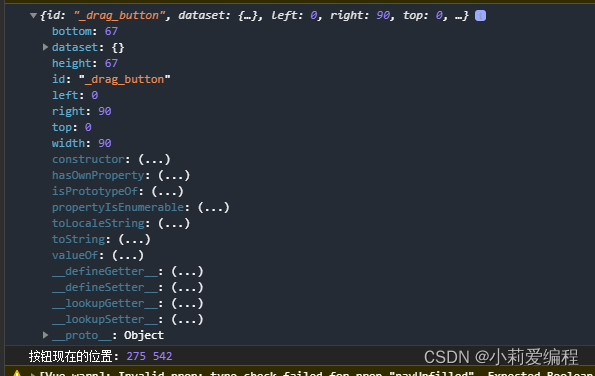
query.select('#_drag_button').boundingClientRect(data => {
console.log(data);
this.width = data.width;
this.height = data.height;
this.offsetWidth = data.width / 2;
this.offsetHeight = data.height / 2;
// this.left = this.windowWidth - this.width - this.edge;
// this.top = this.windowHeight - this.height - this.edge;
this.left = uni.getStorageSync('left')
this.top=uni.getStorageSync('top')
this.$nextTick(() => {
this.firstIn = true
})
}).exec();
},
赋值
<view id="_drag_button" class="drag" :style="{top:top 'px',left:left 'px',opacity:firstIn?1:0}"
			@touchstart="touchstart" @touchmove.stop.prevent="touchmove" @touchend="touchend"
			@click.stop.prevent="click" :class="{transition: isDock && !isMove }">
			<button class="btn" open-type="contact" style="border: none;padding: 0;margin: 0;">
				<image class="img"
					src="图片地址">
				</image>
			</button>
		</view>
全局注册组件
因为我这个项目是vue3,所以注册组件的时候,不需要全局引入,
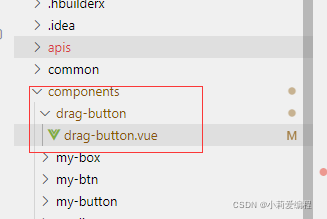
这个组件,需要在每个页面引入;
组件代码:需要换个图片就可以用了;
<template>
	<view>
		<view id="_drag_button" class="drag" :style="{top:top 'px',left:left 'px',opacity:firstIn?1:0}"
			@touchstart="touchstart" @touchmove.stop.prevent="touchmove" @touchend="touchend"
			@click.stop.prevent="click" :class="{transition: isDock && !isMove }">
			<button class="btn" open-type="contact" style="border: none;padding: 0;margin: 0;">
				<image class="img"
					src="图片地址">
				</image>
			</button>
		</view>
	</view>
</template>

<script>
	export default {
		name: 'drag-button',
		props: {
			isDock: {
				type: Boolean,
				default: false
			},
			existTabBar: {
			}
		},
		data() {
			return {
				top: 0,
				left: 0,
				width: 0,
				height: 0,
				offsetWidth: 0,
				offsetHeight: 0,
				windowWidth: 0,
				windowHeight: 0,
				isMove: true,
				edge: 10,
				text: ' ',
				firstIn: false
		onShow() {
			//获取手机信息配置接口
			const sys = uni.getSystemInfoSync();
			//屏幕的宽高
			this.windowWidth = sys.windowWidth;
			this.windowHeight = sys.windowHeight;
			// #ifdef APP-PLUS
			this.existTabBar && (this.windowHeight -= 50);
			// #endif
			if (sys.windowTop) {
				this.windowHeight  = sys.windowTop;
			//获取元素
			const query = uni.createSelectorQuery().in(this);
			query.select('#_drag_button').boundingClientRect(data => {
				console.log(data);
				this.width = data.width;
				this.height = data.height;
				this.offsetWidth = data.width / 2;
				this.offsetHeight = data.height / 2;
				// this.left = this.windowWidth - this.width - this.edge;
				// this.top = this.windowHeight - this.height - this.edge;
				this.left = uni.getStorageSync('left')
				this.top=uni.getStorageSync('top')
				this.$nextTick(() => {
					this.firstIn = true
				})
			}).exec();
		methods: {
			click() {
				this.$emit('btnClick');
			touchstart(e) {
				this.$emit('btnTouchstart');
			touchmove(e) {
				// 单指触摸
				if (e.touches.length !== 1) {
					return false;
				}
				console.log('移动',e);
				this.isMove = true;
				this.left = e.touches[0].clientX - this.offsetWidth;
				let clientY = e.touches[0].clientY - this.offsetHeight;
				// #ifdef H5
				clientY  = this.height;
				// #endif
				let edgeBottom = this.windowHeight - this.height - this.edge;
				// 上下触及边界
				if (clientY < this.edge) {
					this.top = this.edge;
				} else if (clientY > edgeBottom) {
					this.top = edgeBottom;
				} else {
					this.top = clientY
				 uni.setStorageSync("top", this.top);
			touchend(e) {
				if (this.isDock) {
					let edgeRigth = this.windowWidth - this.width - this.edge;
					if (this.left < this.windowWidth / 2 - this.offsetWidth) {
						this.left = this.edge;
					} else {
						this.left = edgeRigth;
					}
				 uni.setStorageSync("left", this.left);
				this.isMove = false;
				this.$emit('btnTouchend');
		}
	}
</script>
<style lang="scss">
	.drag {
		display: flex;
		justify-content: center;
		align-items: center;
		width: 180rpx;
		height: 135rpx;
		border-radius: 50%;
		font-size: $uni-font-size-sm;
		position: fixed;
		z-index: 999999;
		&.transition {
			transition: left .3s ease, top .3s ease;
	.btn {
		background-color: transparent;
		width: 135rpx;
		height: 130rpx;
		z-index: 9999;
	button::after {
		border: none;
	.img {
		height: 100%;
		width: 100%;
</style>
页面引入:
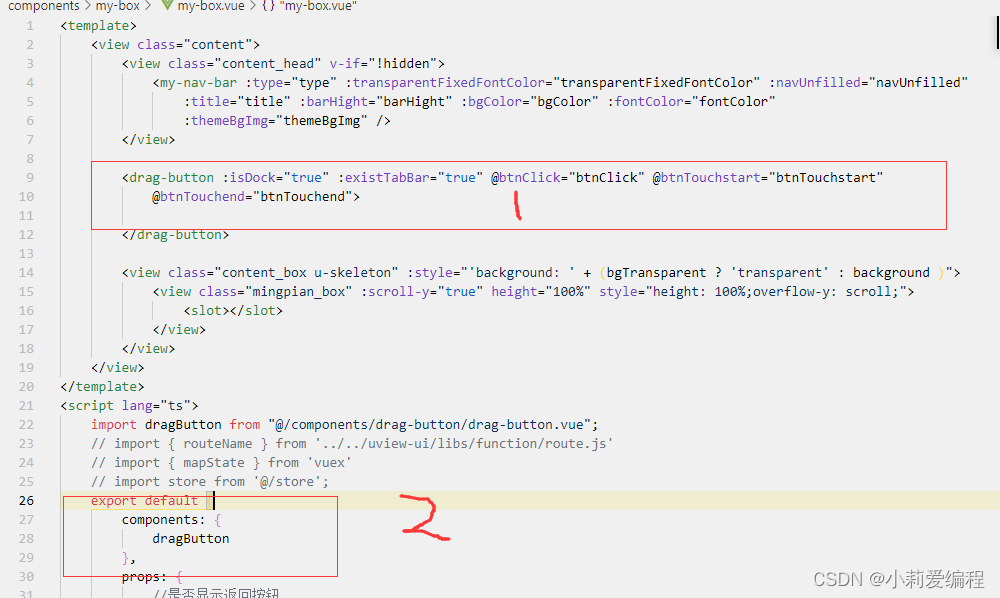
<drag-button :isDock="true" :existTabBar="true" @btnClick="btnClick" @btnTouchstart="btnTouchstart"
			@btnTouchend="btnTouchend">
引入组件
components: {
			dragButton
		},
到此这篇关于uniapp开发小程序如何实现全局悬浮按钮的文章就介绍到这了,更多相关uniapp小程序悬浮按钮内容请搜索Devmax以前的文章或继续浏览下面的相关文章希望大家以后多多支持Devmax!