本文实例为大家分享了flutter实现头部tabTop滚动栏的具体代码,供大家参考,具体内容如下
效果图如下:
main.dart代码如下:
import 'package:flutter/material.dart';
//启动函数
void main() => runApp(MyApp());

//自定义组件
class MyApp extends StatelessWidget {
  @override
  Widget build(BuildContext context) {
    //MaterialApp 是flutter的页面根组件
    return MaterialApp(
      title: 'main根页面',
      debugShowCheckedModeBanner: false,  //清除debug
      //home表示页面信息
      home: AppbarTop()
    );
  }
}

//头部tabTop滚动栏效果组件
import 'package:flutter/material.dart';

class AppbarTop extends StatefulWidget {
  @override
  _AppbarTopState createState() => _AppbarTopState();
}

//混合SingleTickerProviderStateMixin类 同步属性
class _AppbarTopState extends State<AppbarTop>
    with SingleTickerProviderStateMixin {
  //定义一个控制器
  TabController _tabController;

  @override
  void initState() {
    super.initState();
    //混入SingleTickerProviderStateMixin的this
    //实例化一个tab控制器 作用:
    _tabController = TabController(length: choices.length, vsync: this);
  }

  _nextPage(index) {
    int currentIndex = _tabController.index   index;
    if (currentIndex < -0) currentIndex = _tabController.length - 1;
    if (currentIndex >= _tabController.length) currentIndex = 0;
    //控制器移动到currentIndex处
    _tabController.animateTo(currentIndex);
  }

  @override
  Widget build(BuildContext context) {
    return Scaffold(
      appBar: AppBar(
        title: Text('头部菜单栏'),
        centerTitle: true, //title居中显示
        leading: IconButton(
            icon: Icon(Icons.arrow_back),
            onPressed: () {
              _nextPage(-1);
            }),
        iconTheme: IconThemeData(color: Colors.yellow), //头部icon样式颜色
        //右边icon图标 可以多个
        actions: <Widget>[
          IconButton(
              icon: Icon(Icons.arrow_forward),
              onPressed: () {
                _nextPage(1);
              })
        ],
        actionsIconTheme: IconThemeData(color: Colors.white),
        //自定义导航栏
        bottom: PreferredSize(
            child: Theme(
              data: Theme.of(context).copyWith(accentColor: Colors.white),
              child: Container(
                height: 40,
                alignment: Alignment.center, //圆点居中
                //给自定义导航栏设置圆点控制器
                child: TabPageSelector(
                  controller: _tabController,
                ),
              ),
            ),
            preferredSize: Size.fromHeight(48)),
      ),
      //主体内容
      body: TabBarView(
        //主题内容也跟随控制器变化
        controller: _tabController,
        //将数据遍历成n个子组件数组
        children: choices.map((item) {
          return Padding(
            padding: EdgeInsets.all(20),
            child: ChoiceCard(
              choice: item,
            ),
          );
        }).toList(),
      ),
    );
  }
}

//ChoiceCard将数据渲染到Card卡片组件上
class ChoiceCard extends StatelessWidget {
  final Choice choice;
  const ChoiceCard({Key key, this.choice}) : super(key: key);

  @override
  Widget build(BuildContext context) {
    //滚动时的卡片小部件
    return Card(
      color: Colors.blue,
      child: Column(
        mainAxisAlignment: MainAxisAlignment.center,
        children: <Widget>[
          Icon(choice.icon, size: 120, color: Colors.white,),
          Text(choice.title),
        ],
      )
    );
  }
}


//数据的类型
class Choice {
  const Choice({this.title, this.icon});
  final String title;
  final IconData icon;
}
//模拟的数据
const List<Choice> choices = const <Choice>[
  const Choice(title: 'CAR', icon: Icons.directions_car),
  const Choice(title: 'BICYCLE', icon: Icons.directions_bike),
  const Choice(title: 'BOAT', icon: Icons.directions_boat),
  const Choice(title: 'BUS', icon: Icons.directions_bus),
  const Choice(title: 'TRAIN', icon: Icons.directions_railway),
  const Choice(title: 'WALK', icon: Icons.directions_walk),
];
效果图2:
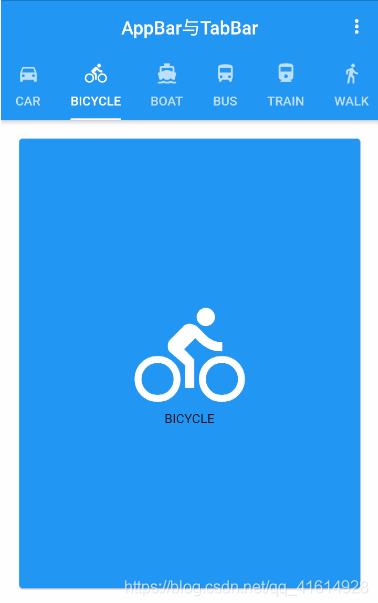
代码如下:
//头部tabTop滚动栏效果组件
class AppBarBottom extends StatefulWidget {
  AppBarBottom({Key key}) : super(key: key);

  @override
  _AppBarBottomState createState() => _AppBarBottomState();
}

class _AppBarBottomState extends State<AppBarBottom> {
  _SelectView(icon, text, id) {
    return PopupMenuItem(
        child: Row(
      mainAxisAlignment: MainAxisAlignment.spaceAround,
      children: <Widget>[
        Icon(icon, color: Colors.blue),
        Text(
          text,
          style: TextStyle(color: Colors.black),
        )
      ],
    ));
  }

  @override
  Widget build(BuildContext context) {
    //tab使用这个组件
    return DefaultTabController(
        length: choices.length,
        child: Scaffold(
          appBar: AppBar(
            title: Text('AppBar与TabBar'),
            centerTitle: true,
            actions: <Widget>[
              PopupMenuButton(
                  shape: BeveledRectangleBorder(
                      borderRadius: BorderRadius.circular(10)),
                  itemBuilder: (BuildContext context) {
                    return [
                      PopupMenuItem(
                          child: _SelectView(Icons.message, '首页', 'A')),
                      PopupMenuItem(
                          child: _SelectView(Icons.message, '商品', 'B')),
                      PopupMenuItem(
                          child: _SelectView(Icons.message, '消息', 'C')),
                    ];
                  })
            ],
            bottom: TabBar(
              isScrollable: true,
              indicatorSize: TabBarIndicatorSize.label,
              tabs: choices.map((item) {
                return Tab(
                  text: item.title,
                  icon: Icon(item.icon),
                );
              }).toList(),
            ),
          ),
          body: TabBarView(
            children: choices.map((item) {
              return Container(
                width: double.infinity,
                color: Colors.white70,
                child: Padding(
                  padding: EdgeInsets.all(16),
                  child: ChoiceCard(
                    choice: item,
                  ),
                ),
              );
            }).toList(),
          ),
        ));
  }
}

//ChoiceCard将数据渲染到Card卡片组件上
class ChoiceCard extends StatelessWidget {
  final Choice choice;
  const ChoiceCard({Key key, this.choice}) : super(key: key);

  @override
  Widget build(BuildContext context) {
    //滚动时的卡片小部件
    return Card(
        color: Colors.blue,
        child: Column(
          mainAxisAlignment: MainAxisAlignment.center,
          children: <Widget>[
            Icon(
              choice.icon,
              size: 120,
              color: Colors.white,
            ),
            Text(choice.title),
          ],
        ));
  }
}

//数据的类型
class Choice {
  const Choice({this.title, this.icon});
  final String title;
  final IconData icon;
}

//模拟的数据
const List<Choice> choices = const <Choice>[
  const Choice(title: 'CAR', icon: Icons.directions_car),
  const Choice(title: 'BICYCLE', icon: Icons.directions_bike),
  const Choice(title: 'BOAT', icon: Icons.directions_boat),
  const Choice(title: 'BUS', icon: Icons.directions_bus),
  const Choice(title: 'TRAIN', icon: Icons.directions_railway),
  const Choice(title: 'WALK', icon: Icons.directions_walk),
];
以上就是本文的全部内容,希望对大家的学习有所帮助,也希望大家多多支持Devmax。